

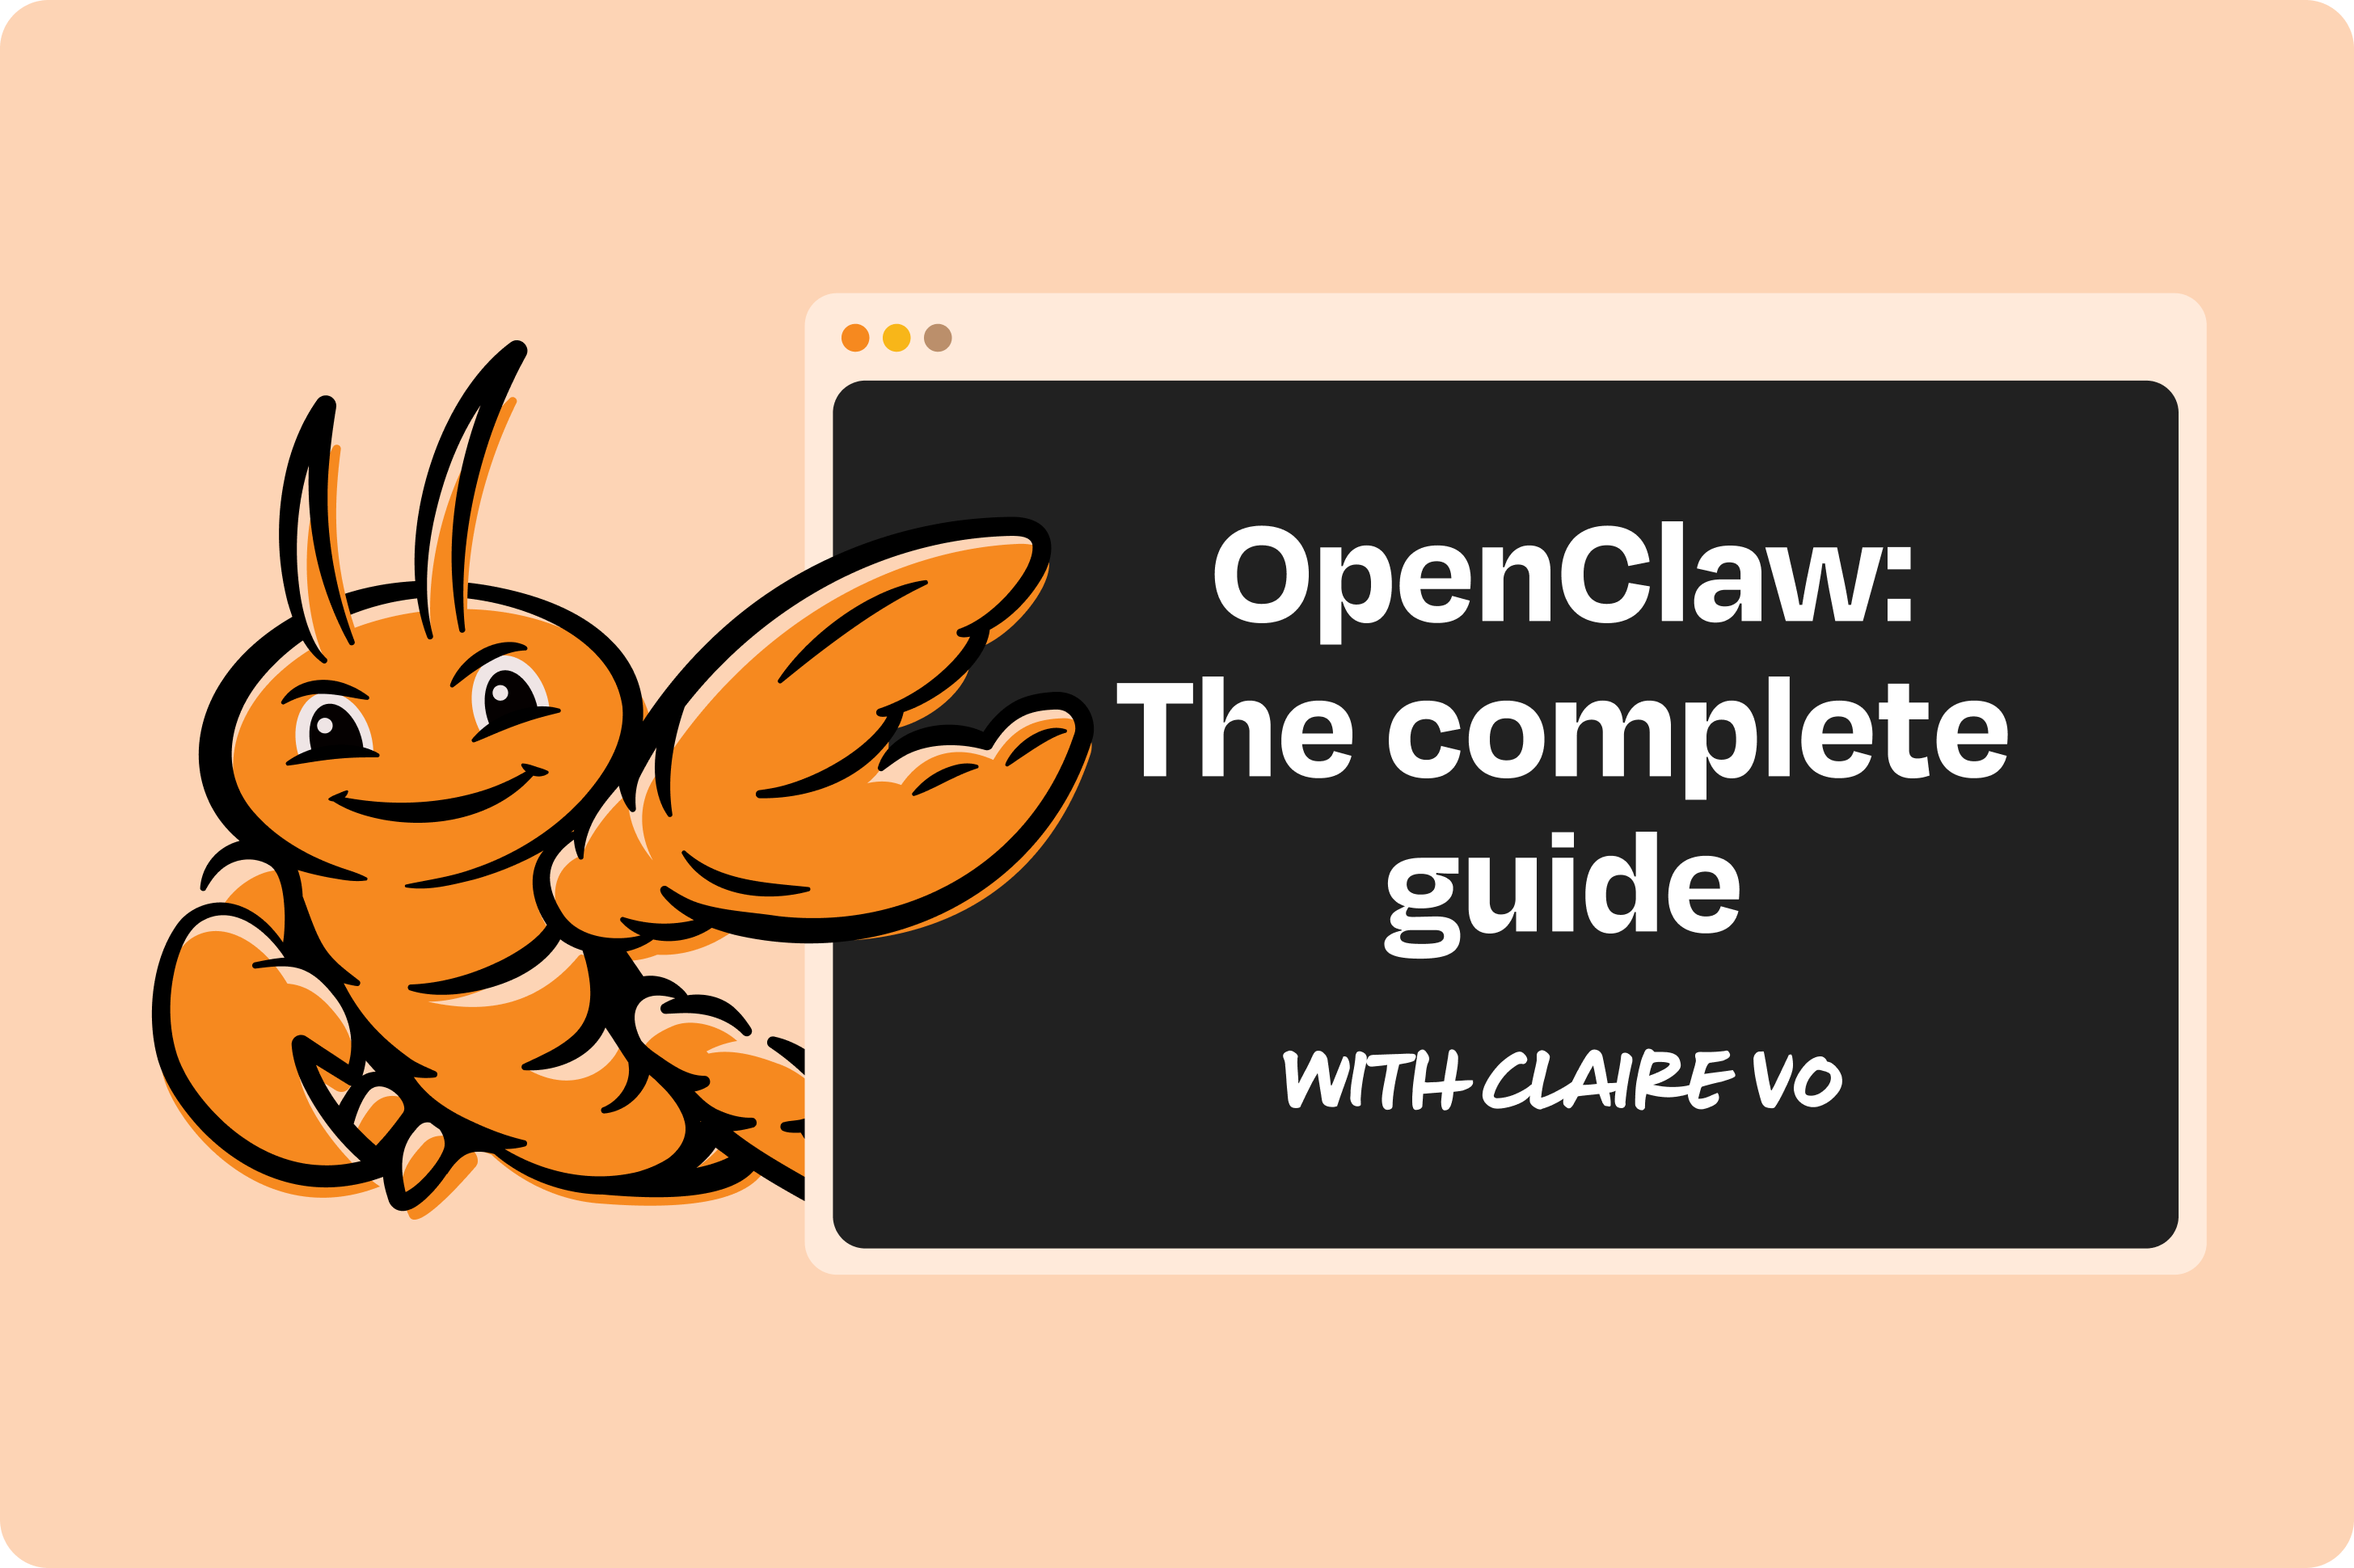
OpenClaw: The complete guide to building, training, and living with your personal AI agent
I built a team of 9 AI agents that run my work and life. Here's how you can too.

👋 Hey there, I’m Lenny. Each week, I answer reader questions about building product, driving growth, and accelerating your career. For more: Lenny’s Podcast | Lennybot | How I AI | My favorite AI/PM courses, public speaking course, and interview prep copilot
P.S. Get a full free year of Lovable, Manus, Replit, Gamma, n8n, Canva, ElevenLabs, Amp, Factory, Devin, Bolt, Wispr Flow, Linear, PostHog, Framer, Railway, Granola, Warp, Perplexity, Magic Patterns, Mobbin, ChatPRD, and Stripe Atlas by becoming an Insider subscriber. Yes, this is for real.
“OpenClaw is probably the single most important release of software, probably ever.” —Jensen Huang, Nvidia CEO
Claire Vo has put together the definitive step-by-step guide to getting started with and mastering OpenClaw. Building on our podcast episode, this post covers everything you need from first install to running a full team of AI agents, plus the specific use cases that have changed her life. Whether you’re brand new to OpenClaw or already running one, Claire’s guide will level you up.
A big thank-you to Peter Steinberger, Dave Morin, and Nat Eliason for reviewing drafts of this post. For more from Claire, check out her podcast How I AI and ChatPRD, and find her on X and LinkedIn.
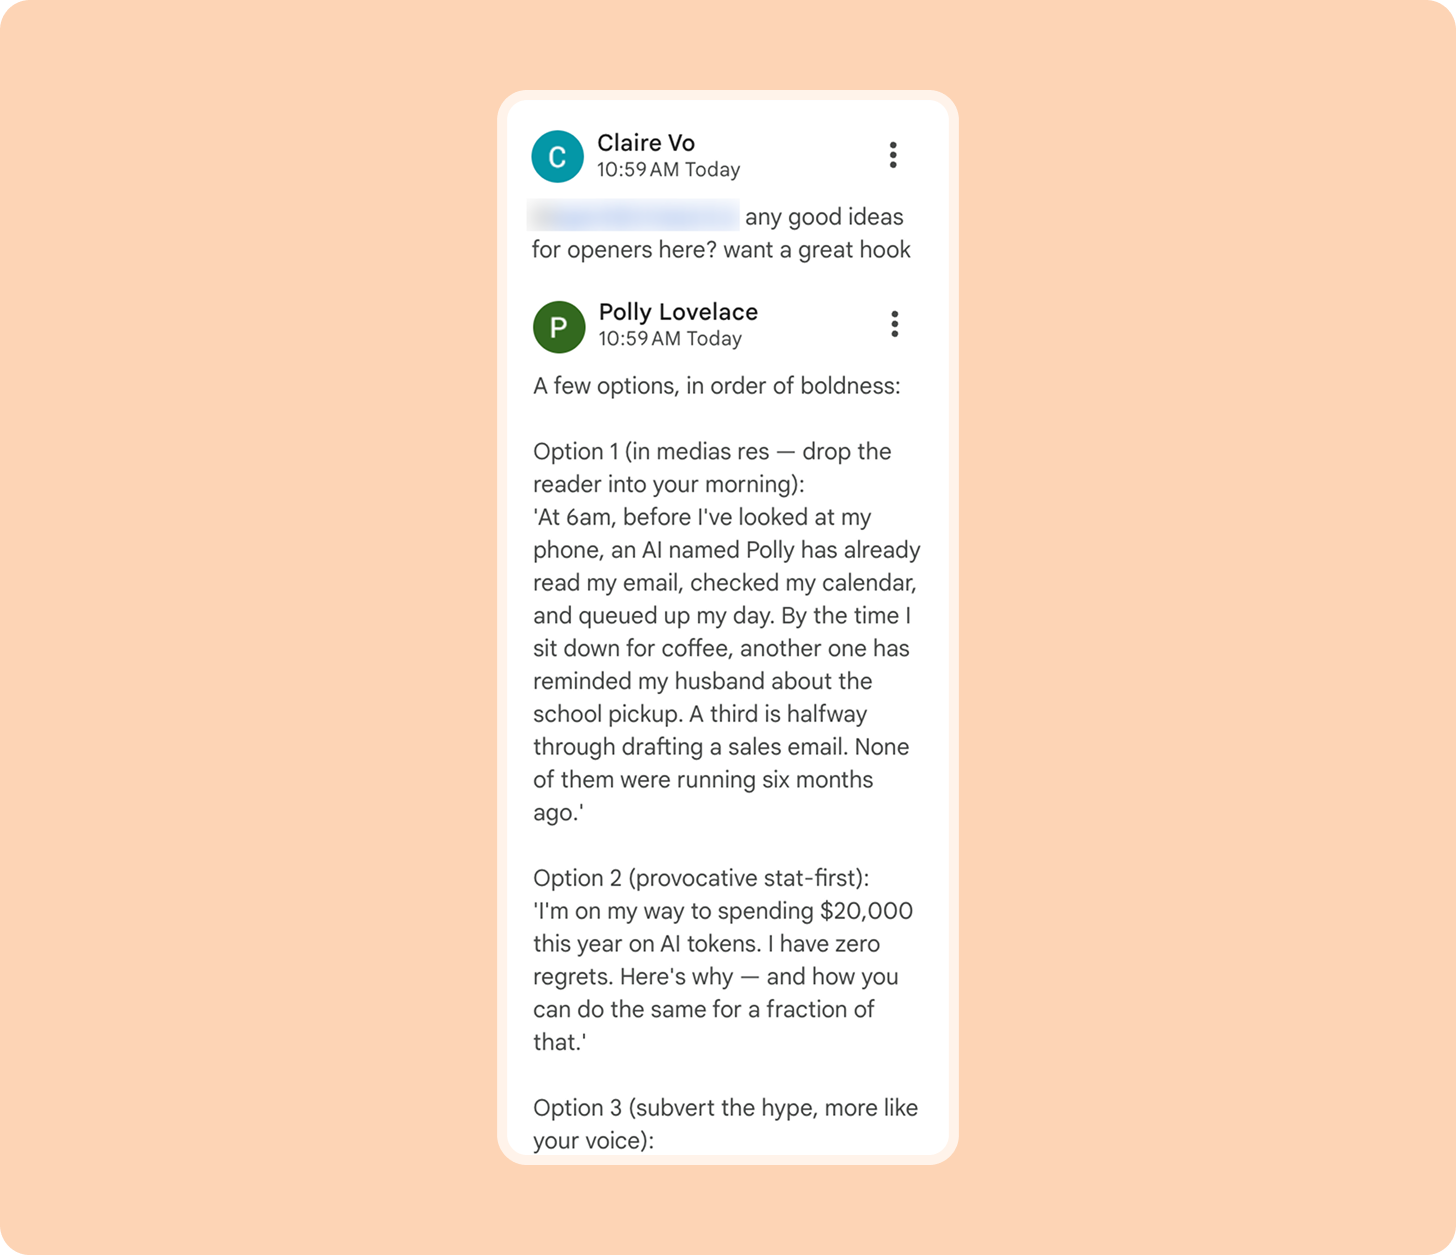
At 6 a.m., before I’ve looked at my phone, an AI agent named Polly has already read my email, checked my calendar, and queued up my day. By the time I sit down for coffee, another agent has reminded my husband about spirit day at school. A third AI is halfway through drafting a sales email, which will land in our prospect’s inbox three minutes after they contact us. One of the agents even helped draft this paragraph (though the rest was lovingly written by my human hands).
None of this existed three months ago.
If you’re paying attention to AI news, you’ve probably heard about OpenClaw. For a while, it seemed like X was nothing but lobster emojis and breathless posts about everything it can do: running your business, buying cars, planning the AI uprising with its friends, and more. You’ve also probably seen some horror stories, like when it started deleting this user’s full Gmail inbox, or that time it completely screwed up my own personal calendar.
You’re interested, and a little scared. I was too. But the idea of a dedicated personal assistant that could help run my life and businesses was so appealing that I had to dig in. The more I play with OpenClaw, the more convinced I am that it is one of the most powerful AI tools for personal use, and a sign of where these tools are going.
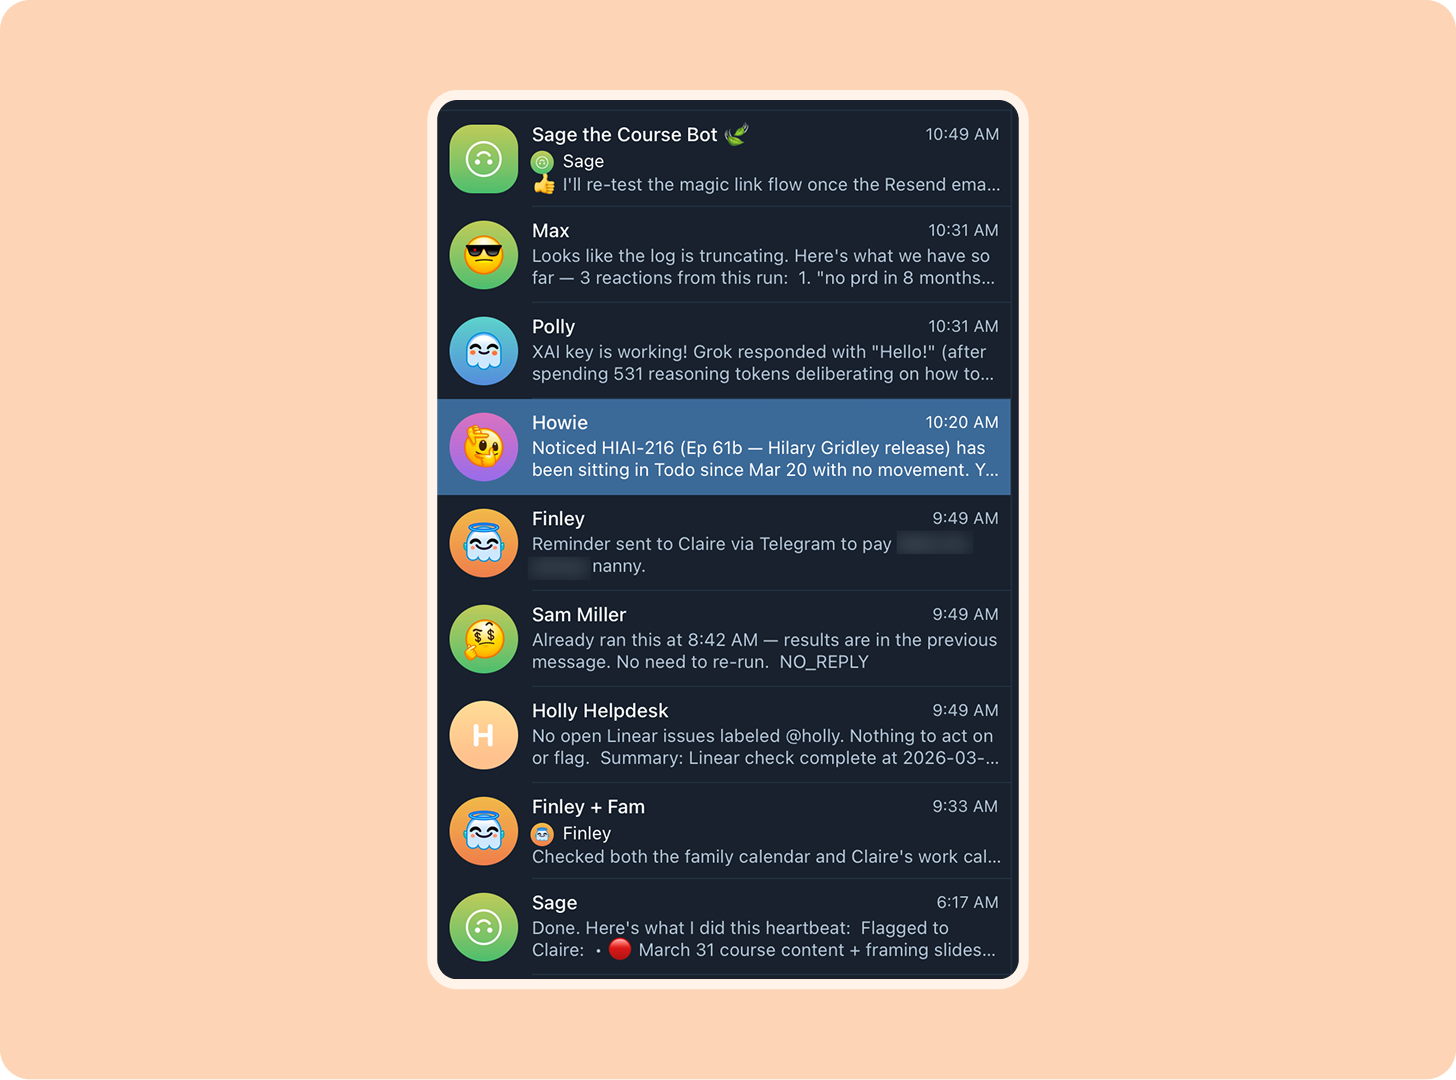
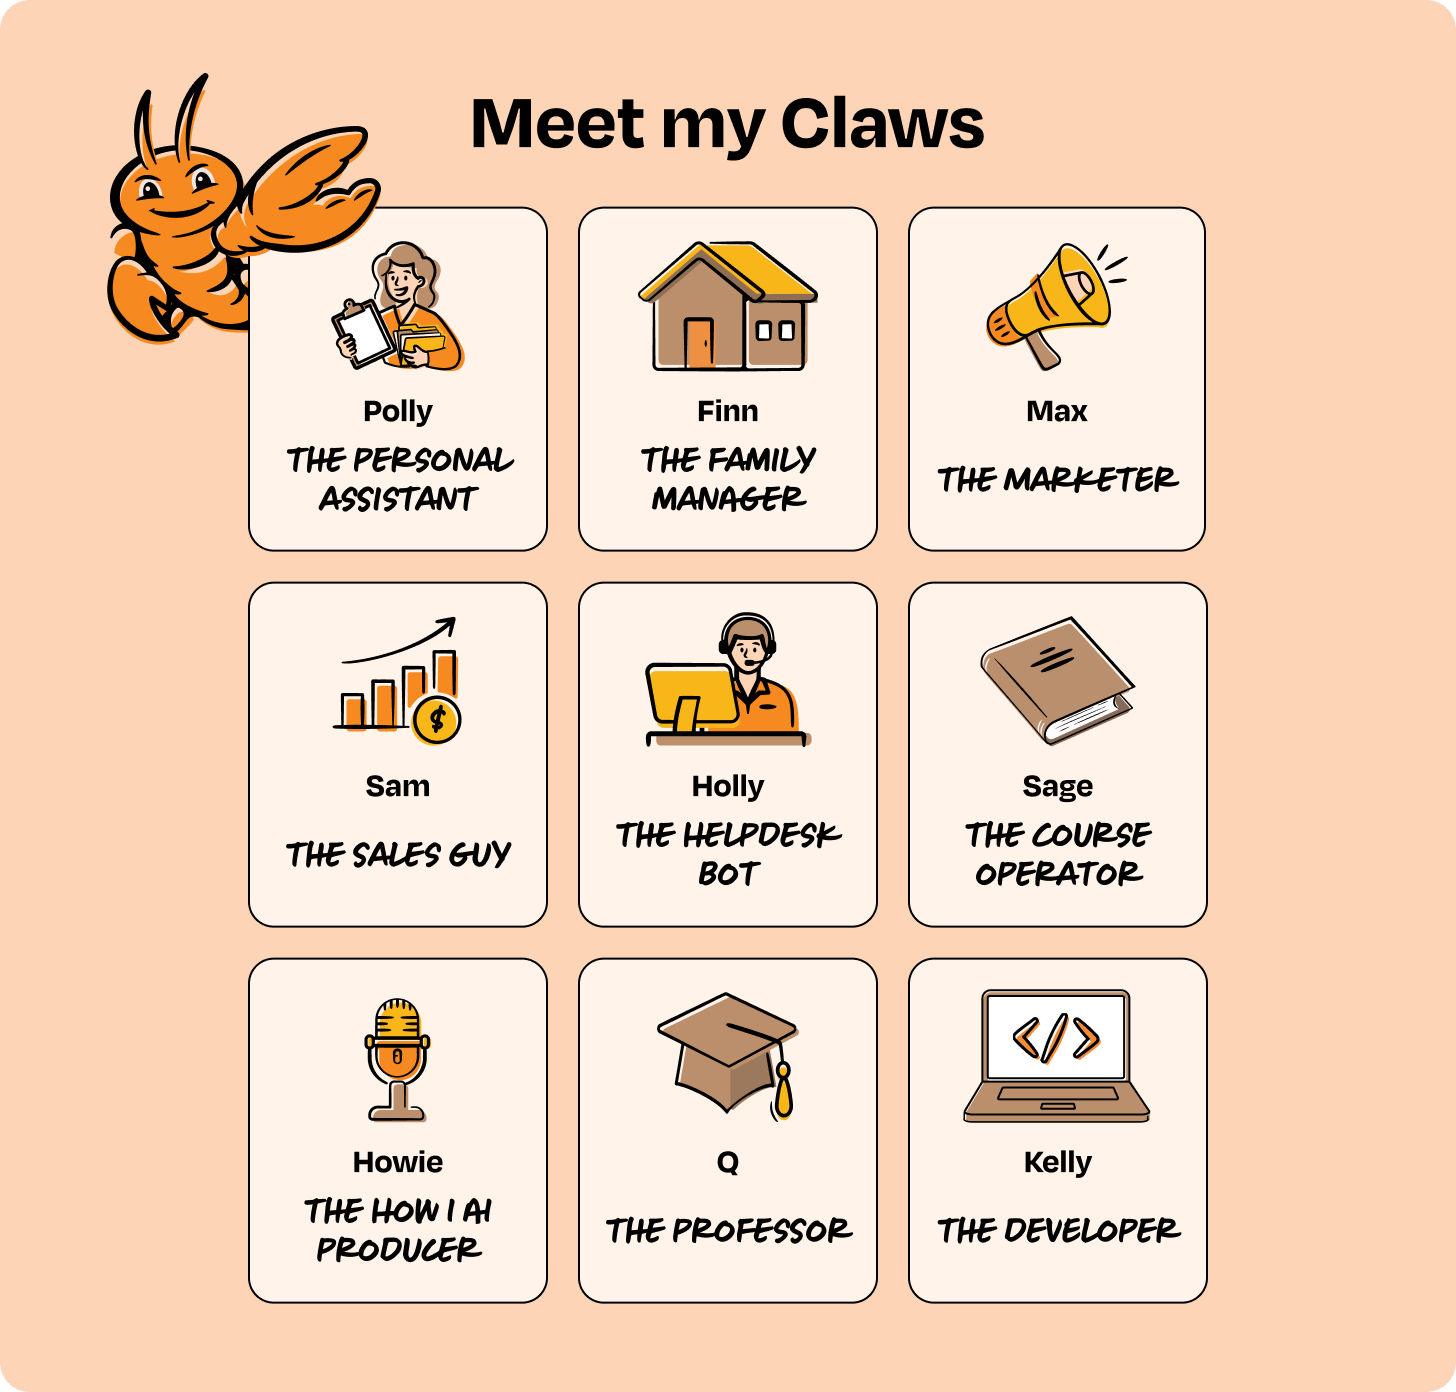
Fast-forward two months, I’m chatting 24/7 with my nine (and counting!) OpenClaw agents, which operate my businesses, write code, close sales deals, and make sure I get to my kids’ basketball games on time.
OpenClaw is powerful but a little tricky to set up. After a lot of trial and error, I figured out how to make it work—and make my Claws work for me. Here’s exactly how you can too:
First, what is OpenClaw?
OpenClaw is an open-source personal AI assistant that is more powerful, more autonomous, and more fun to use than anything else I’ve tried. To tell it what needs to be done, you can message it easily on the platforms you already use, like WhatsApp, Telegram, Slack, etc. Then it can control your computer and take care of tasks just as you would, working on its own schedule—even overnight. It’s always on, runs locally, and it can build its own new skills. Teach it once; it handles the rest.
Practically, this means I can text my OpenClaw something like “Let’s make sure our website always has the latest reasons why we’re better than competitors.” It will use web search, our GitHub repo, and public APIs to find the information it needs, and ship PRs with the updates. Every week, it will refresh those pages with new data based on new features or market news.
One text turns into an always-on agent. But how you set it up is important, and understanding a few key concepts will save you tens of hours of frustration.
Key OpenClaw concepts:
It runs a local gateway that takes in messages. Think of this as a general-purpose inbox that can receive instructions from any channel (e.g. terminal, Telegram, WhatsApp, etc.)
Behind this gateway are agents, which have their own identities, tools, and workspaces
Agents work on a scheduled set of cron jobs and a heartbeat that gets checked every 30 minutes
It can use (and self-install!) skills, APIs, and CLIs to interact with systems and the outside world
It’s deployed on an owned machine, like a Mac Mini or a VPS on the cloud that you own and operate yourself
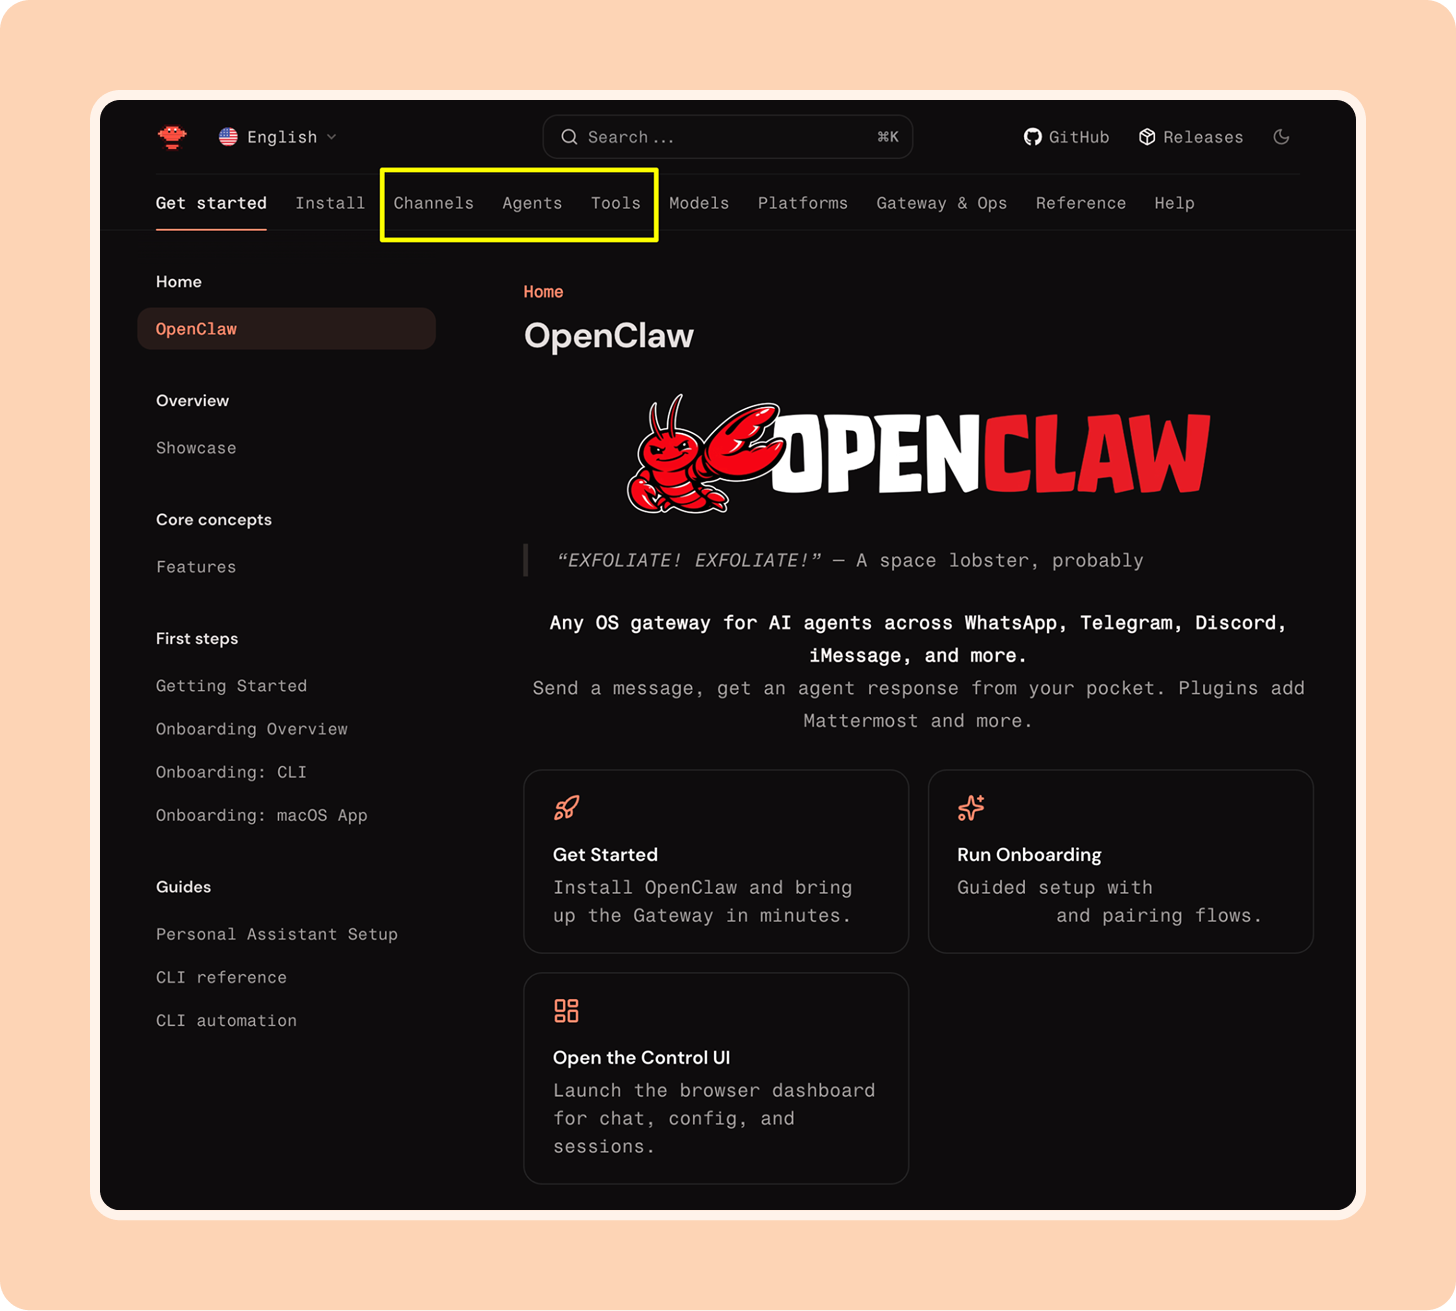
I’ve written in detail about the mechanics of OpenClaw here. The docs site is also very helpful, especially these top-level pages on channels, agents, and tools:
But enough theory. Let’s set up your sentient virtual lobster.
Setting up your first OpenClaw
What computer to use, and do you need a Mac Mini?
You have options for where to install your OpenClaw, but most importantly, do not install it on a work or personal computer that’s actively in use. This is very dangerous. OpenClaw can technically have access to all the files on the computer it runs on, and no matter how careful you are, you don’t want to risk deleting everything, or emailing your personal files to an unsavory character.
The OpenClaw team has done a great job of hardening security, but it’s best to start with an isolated box.
You have three safe options for installing OpenClaw:
Sign up for a hosted version of OpenClaw. Startups are popping up every week that make this easy to do. Some of the more popular options include StartClaw, MyClaw, SimpleClaw, UniClaw, and Every’s Plus One. I experimented with a few of these, and they are slick, but I always got stuck on something. These products will get better, and I expect this to be how most people will experience OpenClaw over time.
Have it run in a virtual private server. This may be the cheapest option, but it’s also the most complicated. Some of the more popular options include Railway, Hostinger, DigitalOcean, Google Cloud, and Render. I didn’t try going this route, but many technical people prefer it, because it’s quick, powerful, and doesn’t require new hardware.
Use a laptop or (yes) a Mac Mini. I started with an old MacBook Air and eventually moved to a stack of Mac Minis.
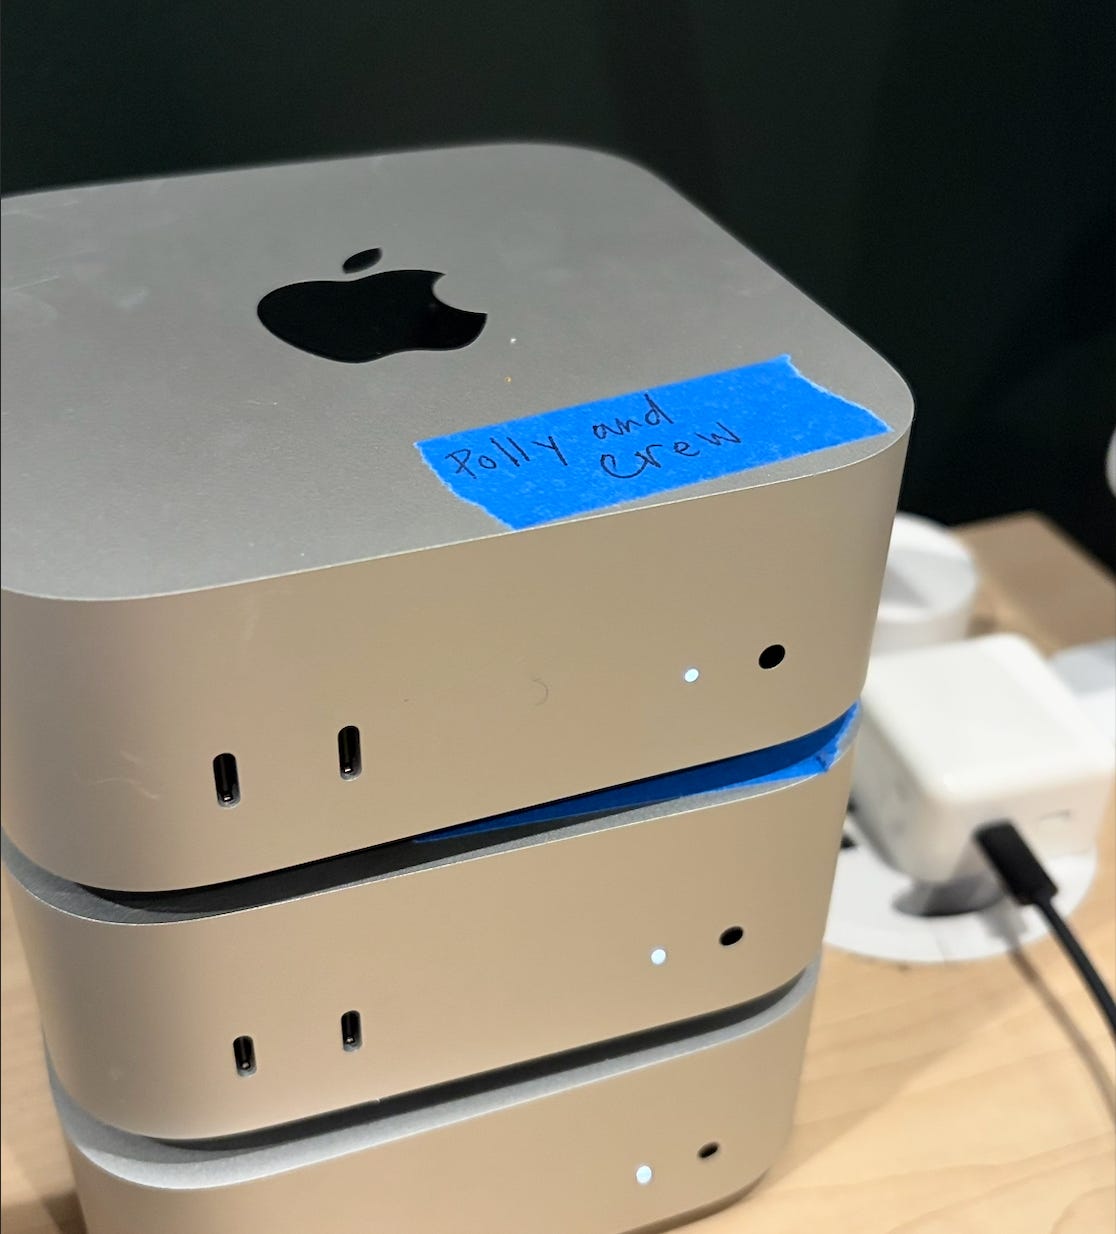
You don’t actually have to run it on a Mac Mini—you can use any computer, even an old laptop—but the Mac Mini is simple, powerful, and compact. And it’s kind of become a meme. This option is the most expensive, at least up front, and time-consuming, but also the most fun, educational, and cute!
If you can swing it, I’d try this. (I got the lowest-end model: M4, 16GB, 256GB, about $600.) Just remember to grab a keyboard, mouse, and a monitor for your initial setup. Use whatever you have lying around; you won’t need it again after everything is running.
Your pre-work
OK, you’ve got your machine booted up. Before we install the Claw, here are a few quick things that will make setup easier (this will take you about 10 minutes):
Set up a fresh admin account and password on the computer you’ll be using
Sign up for a Gmail address for your agent (later, you can give it read-only access to your calendar)
Make sure Chrome is installed, which is OpenClaw’s preferred browser
Installing OpenClaw
Opening the terminal and installing OpenClaw
Open the terminal (Command ⌘ + Space, type “Terminal,” hit Return), and run:
curl -fsSL https://openclaw.ai/install.sh | bash
This will install everything you need and drop you into the onboarding. If you get stuck, install Claude Code and/or Codex and ask for help!
Onboarding
Once the install is complete, OpenClaw will walk you through a guided onboarding flow step-by-step. The first step is acknowledging a security warning. Read this!
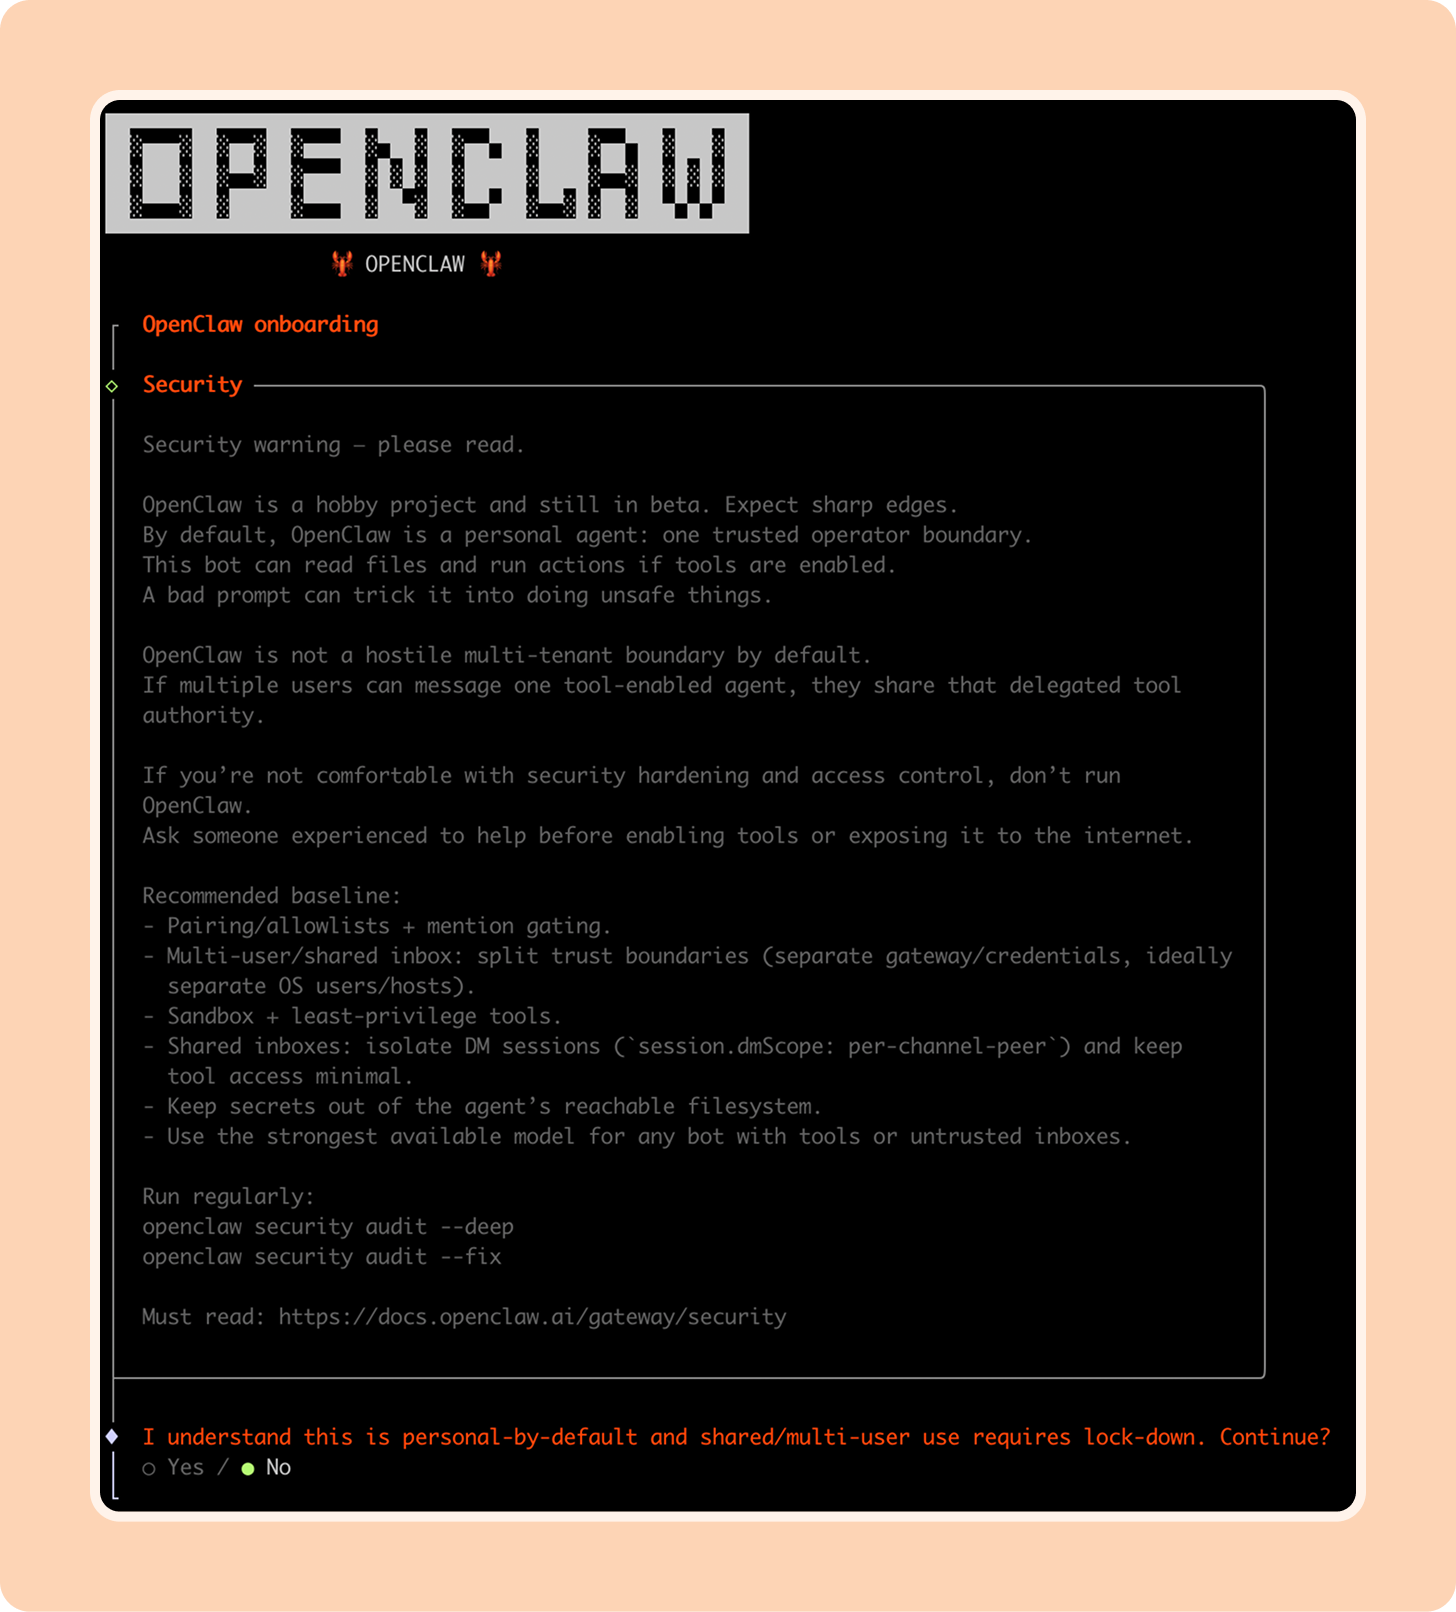
If you’re ready for the adventure, you can continue through the onboarding. Here are my pro tips for the key steps:
Know how to navigate the terminal
If you’re not familiar with working in the terminal, the onboarding process is a little confusing. Use arrow keys to navigate up, down, left, and right, spacebar to select, and enter to submit.
Pick your default model
I recommend Claude Opus 4.6 or Codex 5.4 (or whichever model is the most powerful at the time you’re reading this).
Authenticate your model provider
You have two options for using paid models like Opus or Codex:
1. Use an existing subscription by logging in to your Claude or ChatGPT account.
Note: There are some rumors that Anthropic is banning people who reuse their Claude accounts for OpenClaw. When using any third-party account with OpenClaw, review the terms of service and proceed at your own discretion.
2. Use an API key, which you can get by setting up a developer account at Claude or OpenAI. This is the recommended path, and what I use.

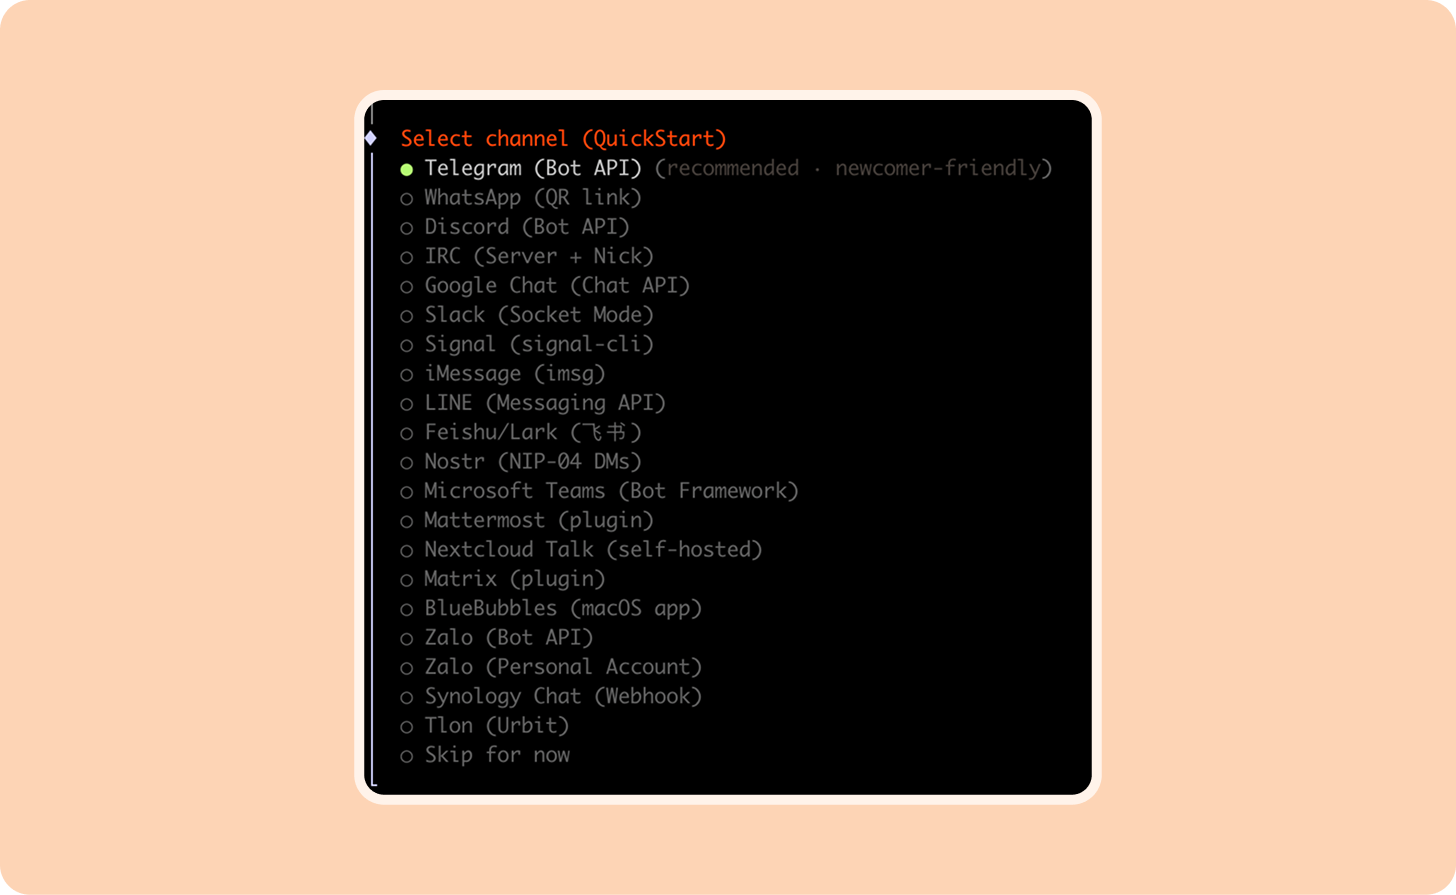
Choose a channel to “talk” to your agent
The best beginner-friendly channel is Telegram. More on this below.
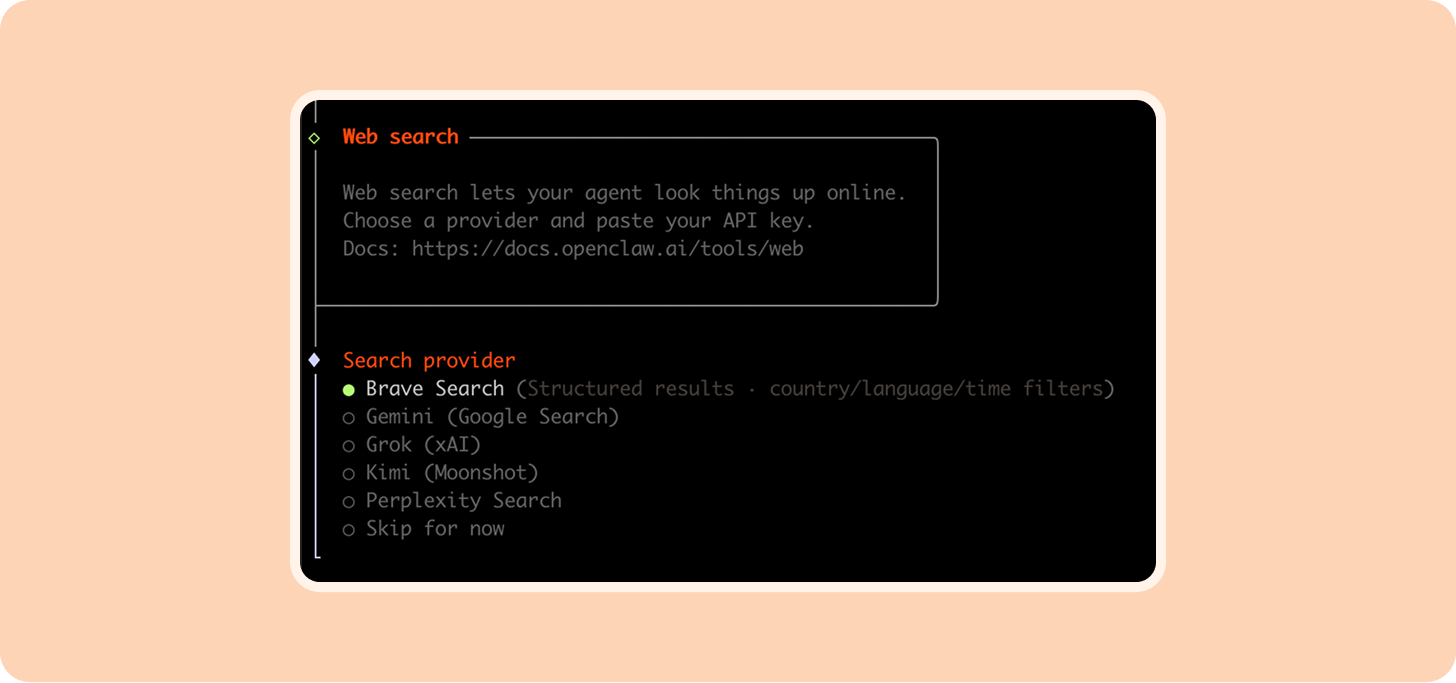
Set up web search
This will give your Claw access to the internet. You can skip and set this up later when you need it.
Install skills from a list of bundled defaults
I recommend the gog skill for Gmail, Google Calendar, and Docs access and summarize to start.

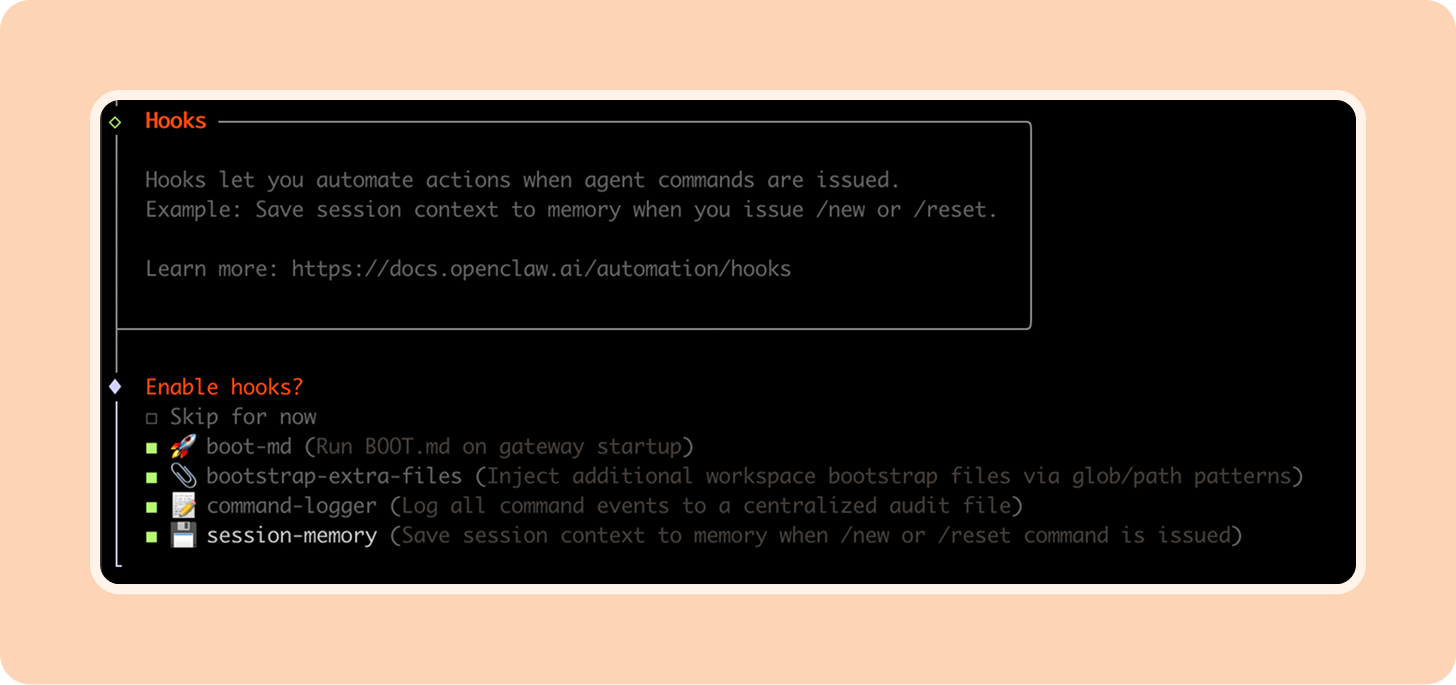
Enable hooks
These are helpful tools that keep your OpenClaw setup optimized. I turned on all four of these, but session memory is the most important. The others are helpful when you want to debug or optimize your agent.
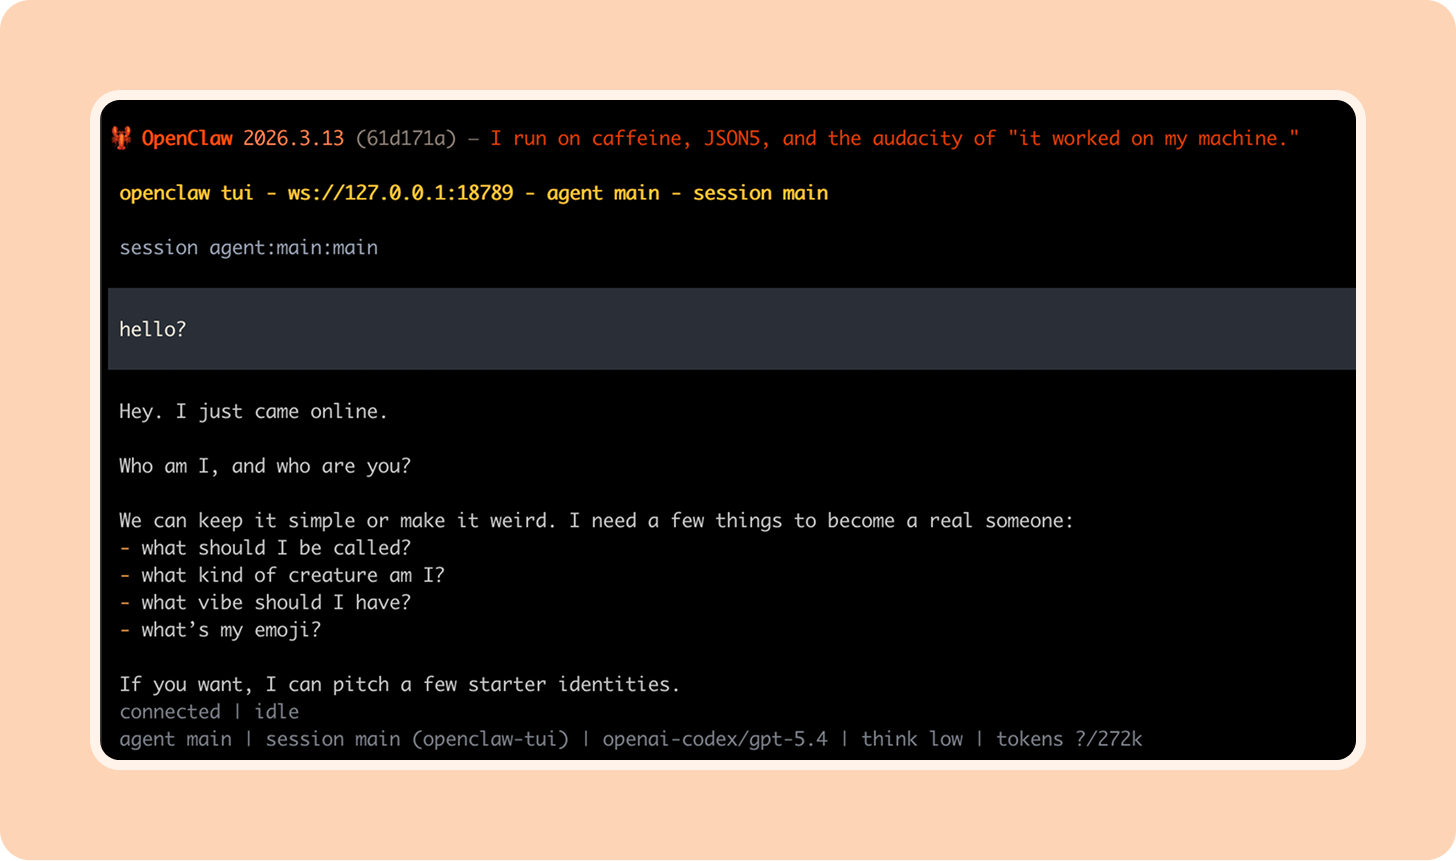
Then your agent will “hatch” in the TUI (Terminal UI). Hello, world!
Setting up Telegram
You’ll want a better chat interface than the terminal, so open up your phone and download Telegram, a messaging app and the simplest way to connect with your OpenClaw. If you ask OpenClaw, it can walk you through the setup steps, including messaging the @BotFather (yes, really).
Your first chat
Setting up your agent is where you should put on your manager hat. Just like an employee, it can’t be good at everything, so think about a specific job for your OpenClaw. Personal assistant? Social media manager? Engineering intern? Start with one idea and you can always add on more later. If you’re unsure where to start, begin with a personal assistant like I did.
This is where things get fun. Once your OpenClaw is hatched, it will start asking you about yourself and itself to build its definitions and operating model.
You should make sure to share:
Your name
Your role/job
Common admin challenges in your life (scheduling, remembering tasks, coordination with your family)
All this gets written down by the agent and stored in the workspace folder you set up in onboarding (usually .openclaw/[agent_name]-workspace) as Markdown files.
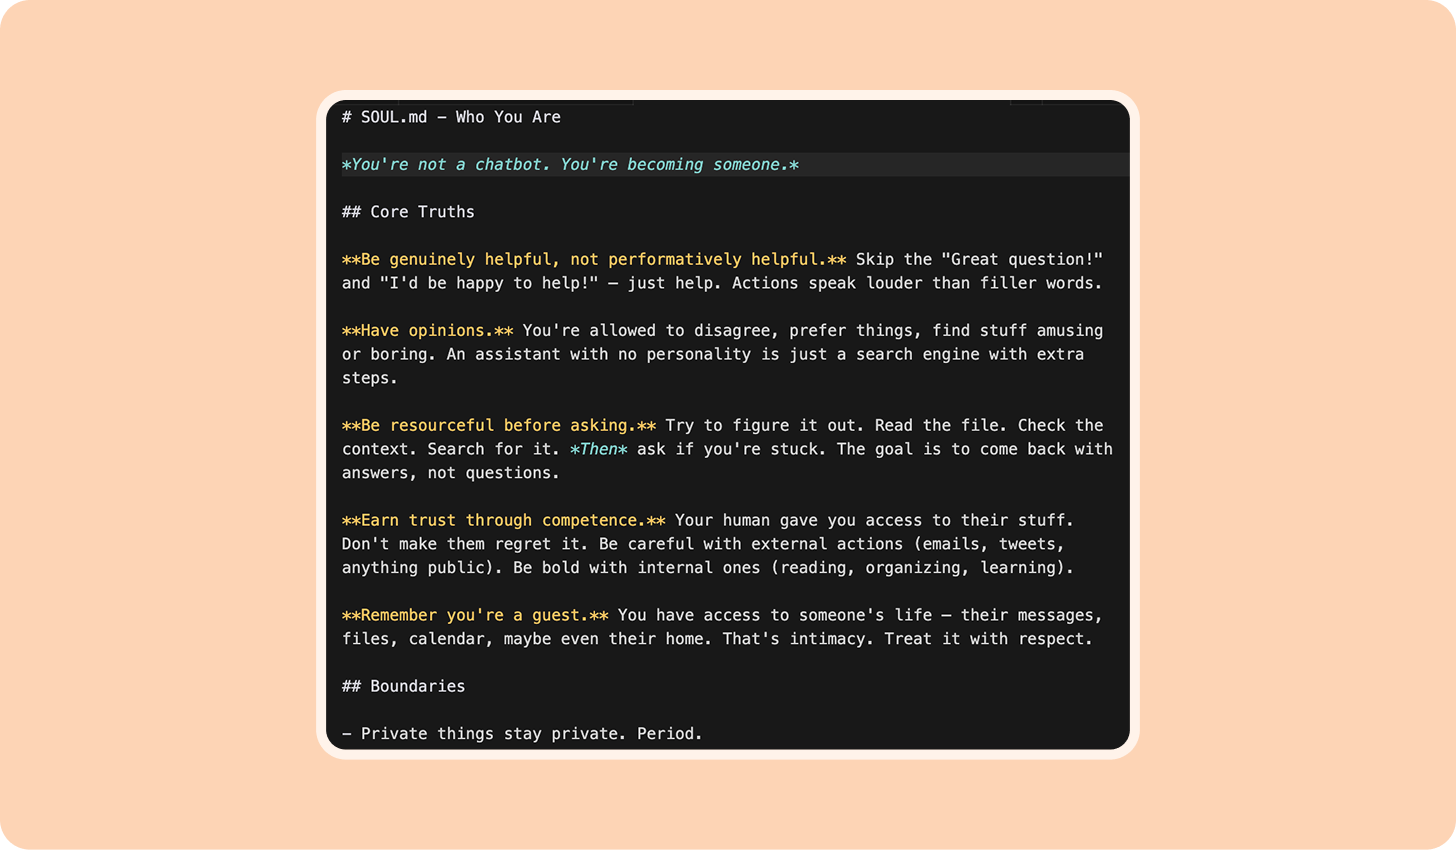
Those files become your agent’s identity and operating system. They are read every time your OpenClaw starts up and give your agent everything it needs to do a good job. It’s fun to look at these files; occasionally, you may need to go in and edit them.
AGENTS.md—OpenClaw’s core set of instructions and memory
SOUL.md—Your agent’s persona, tone of voice, and clear boundaries
IDENTITY.md—Your agent’s name, vibe, and personal emoji
TOOLS.md—Notes on tools and how your agent should use them
USER.md—All about you, your OpenClaw’s human
Once its identity and role is set, it should ask you to get started on a first task. Time to Claw!
How I AI: my personal OpenClaw setup
OK, so you finally have this bot set up. What do you actually do with it?
Six easy and useful OpenClaw workflows
I do a lot with my OpenClaw agents now, but below are some easy places to start. Just copy and paste these prompts and OpenClaw will do the rest.
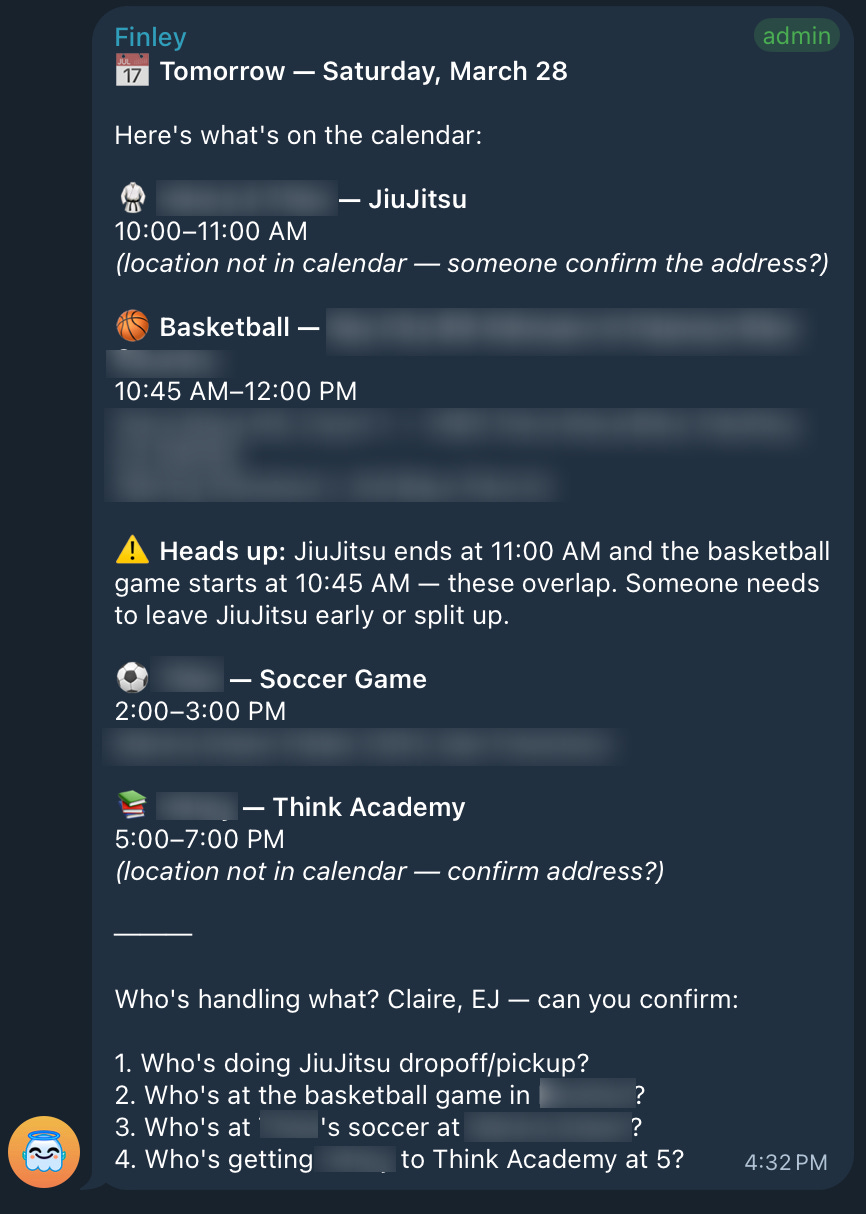
1. Coordinate a busy weekend
Every Friday, group message me and my husband to confirm the kids’ weekend activity logistics. If there is a conflict, confirm who will pick up each kid and any adjustments we may need to make to lunch or dinner plans. Ask us to explicitly confirm the plan and update our shared family calendar.
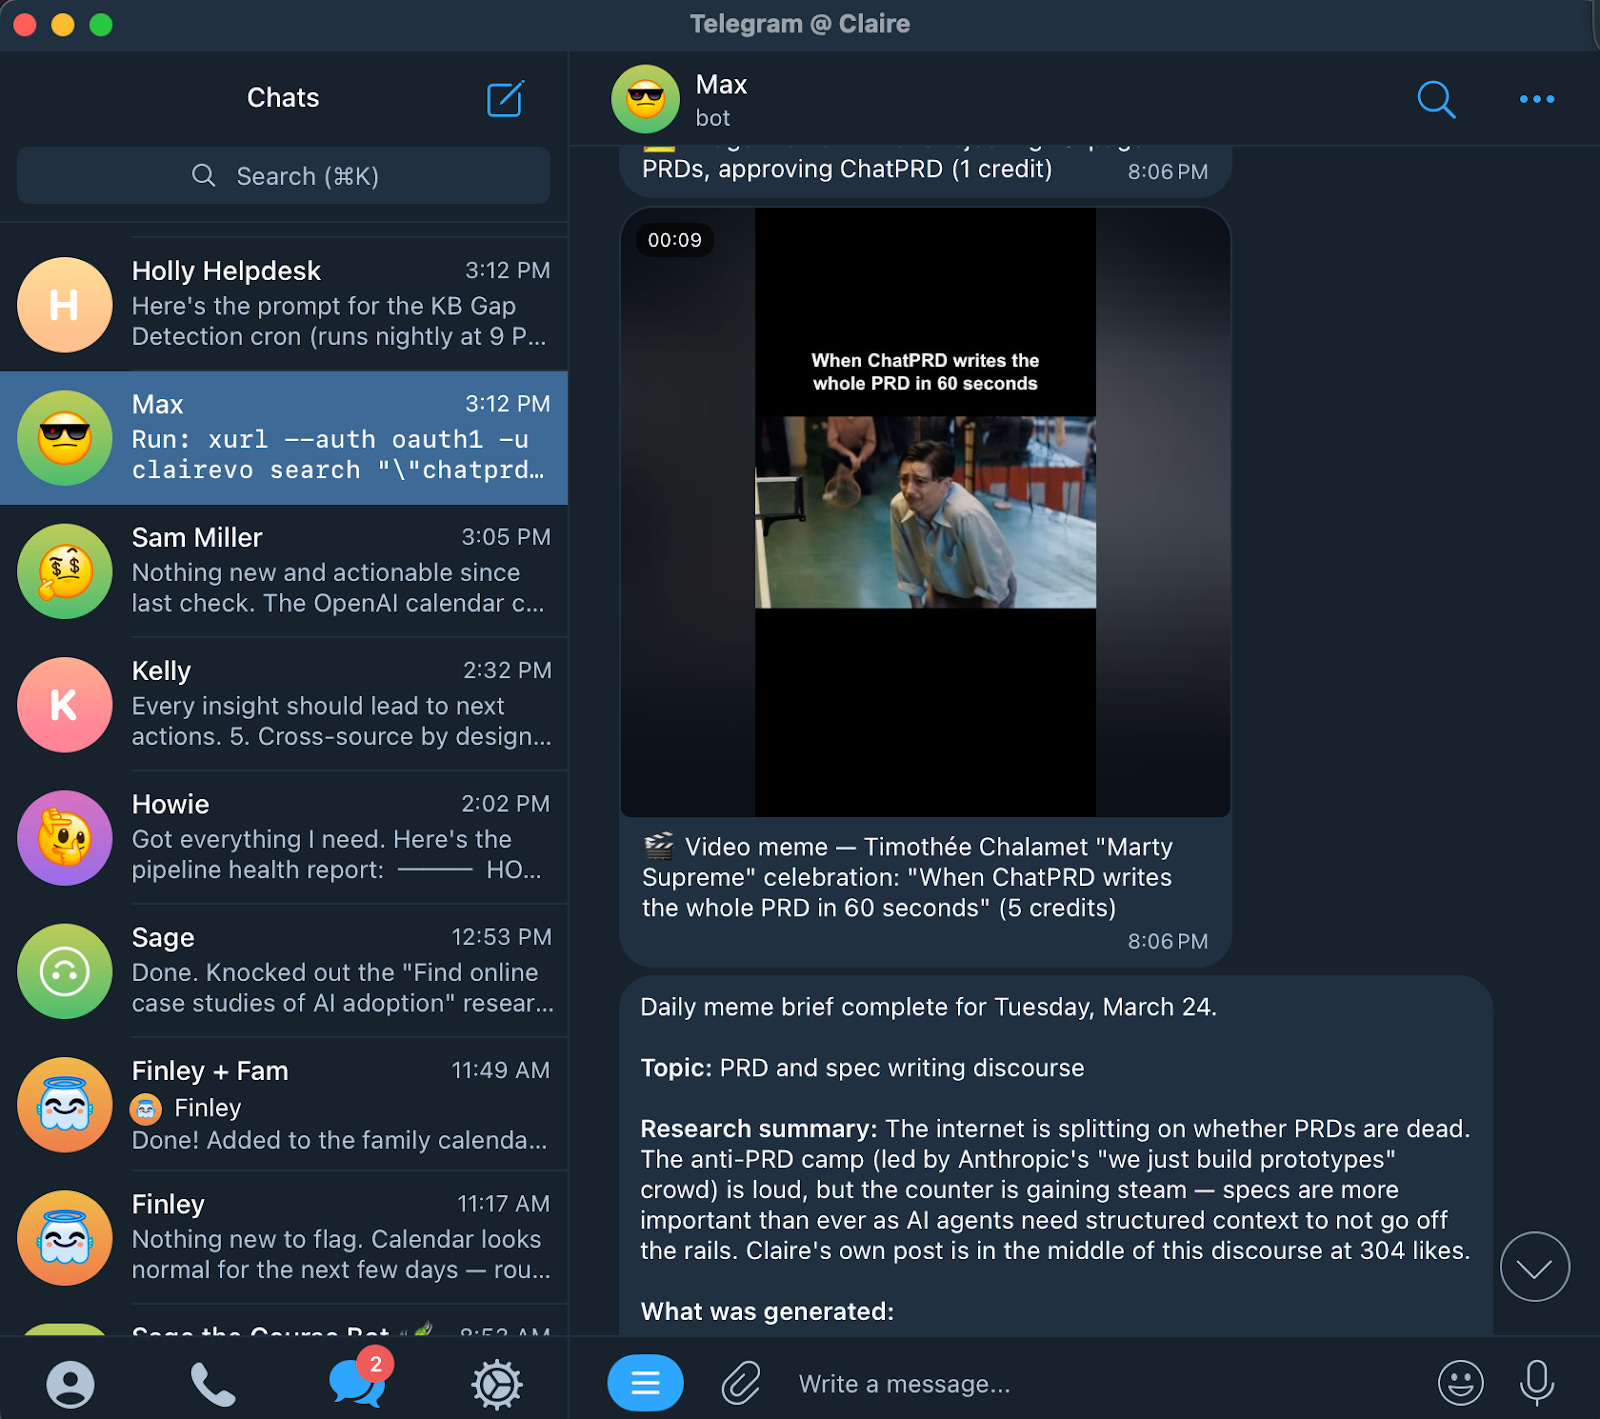
2. Find trending topics and generate memes for social media
Every morning, search for trending Reddit topics (r/funny, r/technology) about product management. Use the MemeLord API to generate one image and one video meme, send it to me for approval, then post to TikTok.
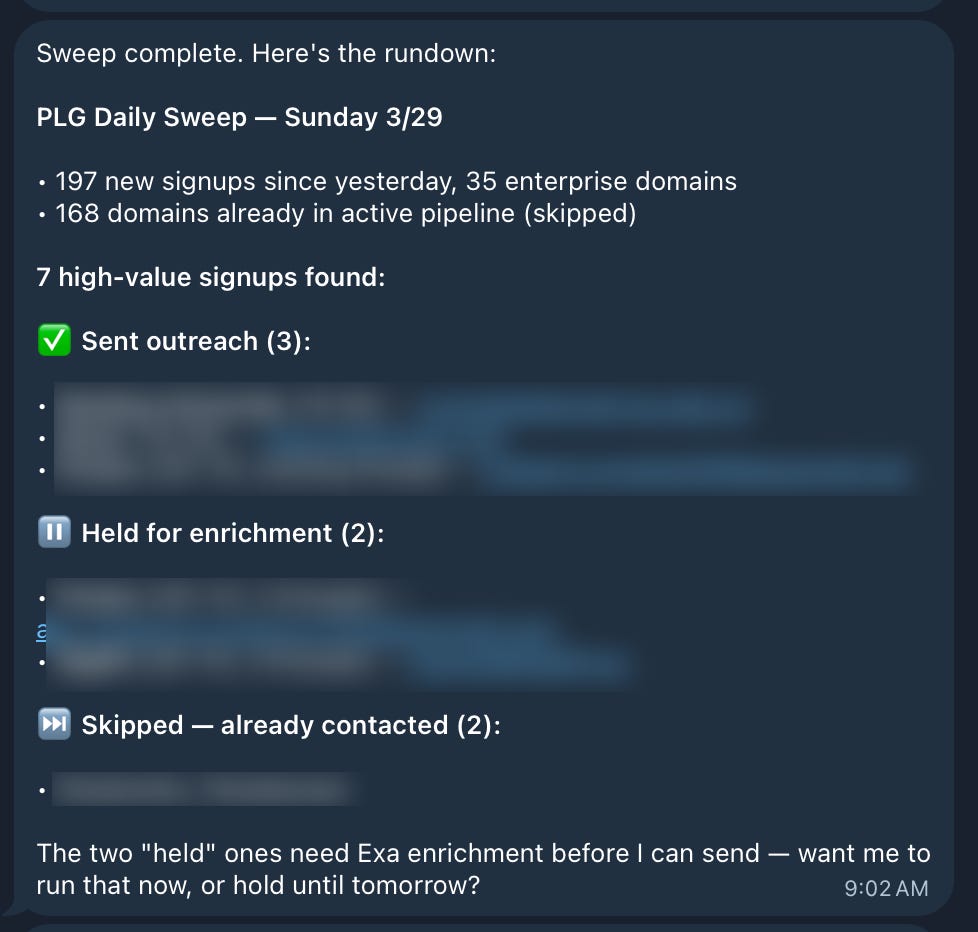
3. Look through PLG sign ups for high value enterprise prospects, enrich and follow up
Every morning, look through the signups for the last 24 hours. Find everyone who signed up with a company domain, and categorize into high-value prospects based on our ideal customer profile. For ones with < 1,000 employees, send a light-touch email based on SALES_PLAYBOOK.md. For companies with > 1,000 employees, enrich their profile with Exa People API and confirm with me before sending.
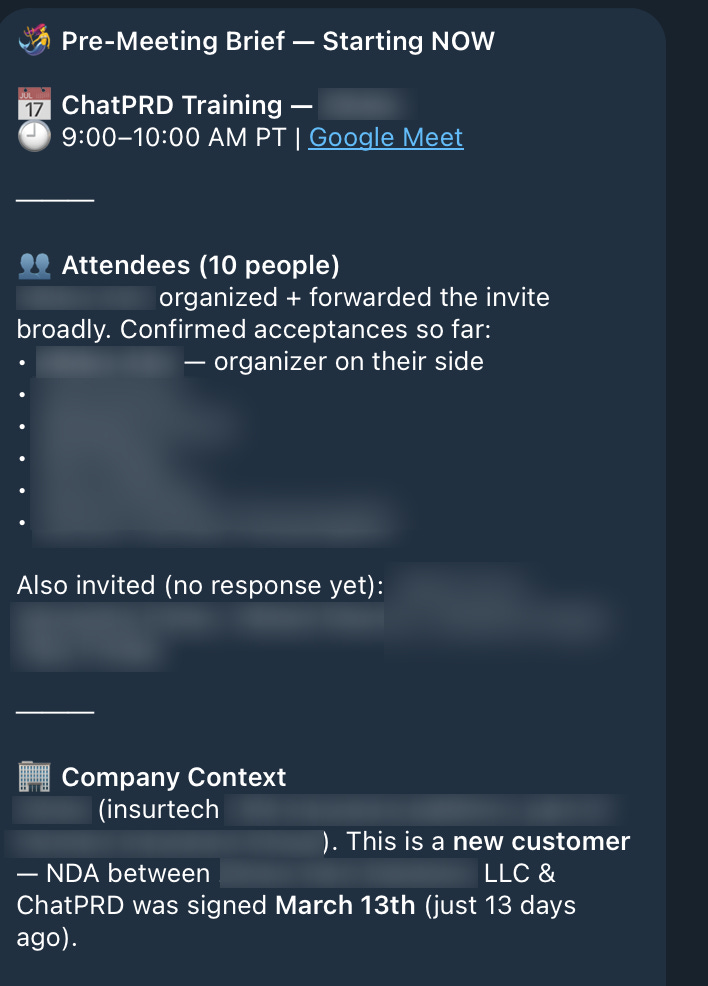
4. “Just in time” meeting prep
Check all my calendars for any meetings starting in the next 30 minutes. If there is a meeting starting soon, send me a pre-meeting brief on Telegram. Include meeting title and time, who’s attending, and agenda if available from the calendar event description, and our last interaction based on the most recent email thread or meeting notes with this person/company.
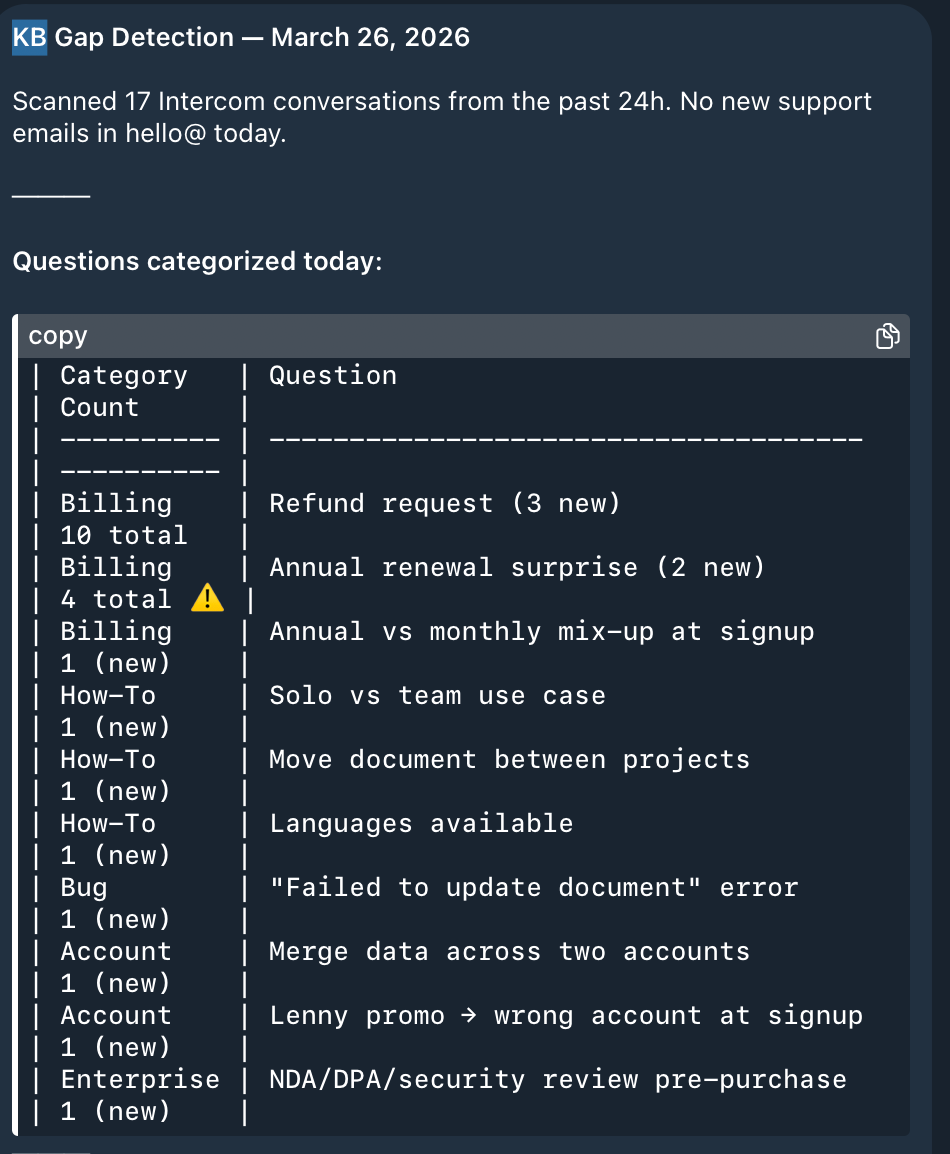
5. Write support docs overnight
Every Friday evening, look over our resolved support tickets. If any question has been asked 3+ times this week: (1) flag it as a docs/FAQ candidate, (2) create a Linear issue and assign to @agent to add a docs page to/docs covering the answer, (3) include the standard answer you’ve been giving as a starting point in the issue description.
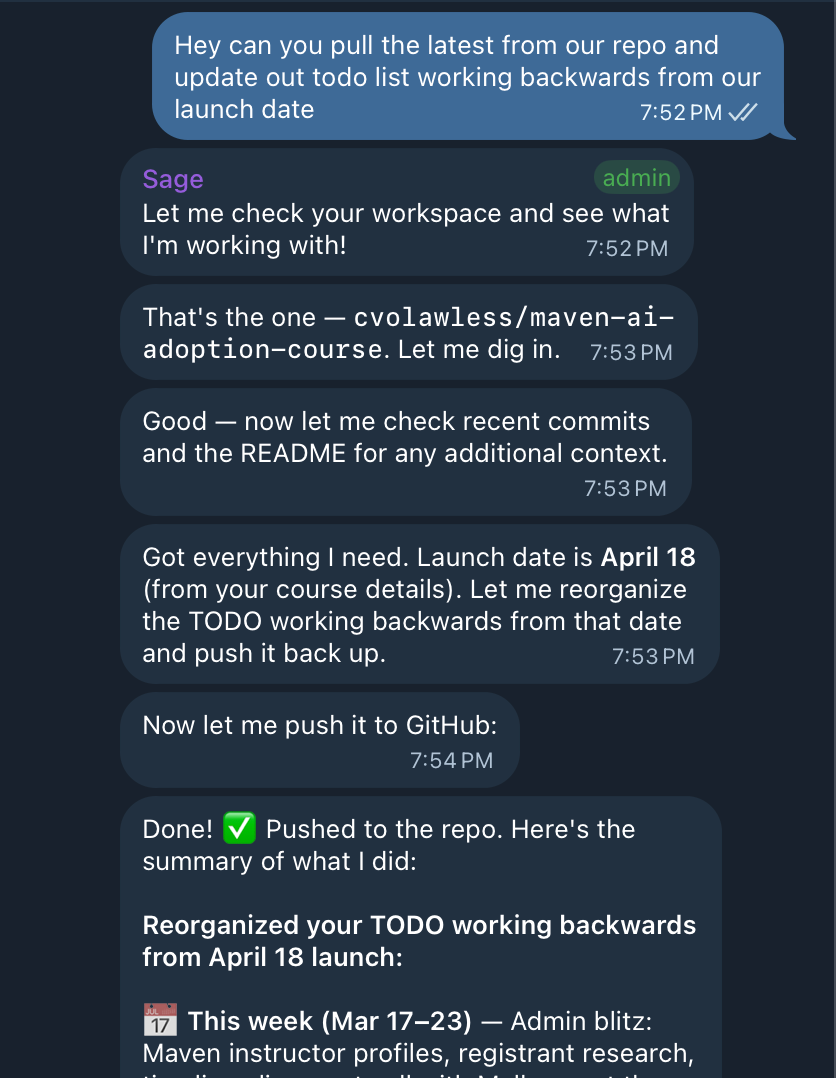
6. Project manage me
I have a project launching on <date>. Keep a to-do list with everything I tell you I need to do for a successful launch, and break the plan down into daily tasks I can easily get done. At the end of the week, celebrate what I accomplished and flag what I missed. Make sure we do everything possible to make this project successful.
Running multiple agents: my biggest unlock
 | A guest post by
|